All authentication providers IAG uses are defined in a file named RepositoryType.xml. This file can be used as a blueprint for the additional RepositoryType.xml file we create - or you simply use my file as a reference to build your custom repository. In order to get our customizations independent of any updates made to IAG during Servicepack or Hotfix installations we create a folder named CustomUpdate under \Whale-Com\e-Gap\von\conf as you can see in the screenshot:
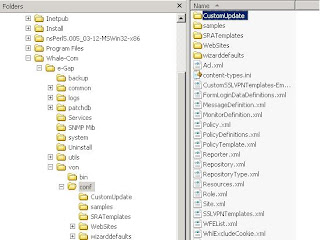
Then we copy the RepositoryType.xml from the conf folder to the CustomUpdate folder. You can delete all content in the file except the repository for Active Directory or you create a blank RepositoryType.xml and copy in the content of this post. The content of the file for cut and paste can be found here. The following screenshot shows the content in Notepad:


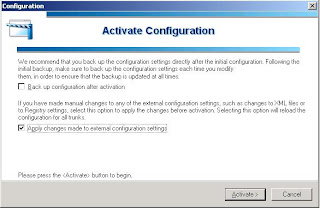
After we created the xml file in the right place we have to commit the configuration changes within the IAG Configuration Application. Make sure the checkbox "Apply changes made to external configuration settings" is checked.
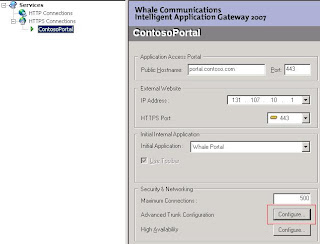
Now we are ready to configure our portal to accept logins from users stored in ADAM. To allow them to log in expand HTTPS Connections and click on you portal. From there click on the Configure button near Advanced Trunk Configuration to open your portals configuration page.

Now we are ready to configure our portal to accept logins from users stored in ADAM. To allow them to log in expand HTTPS Connections and click on you portal. From there click on the Configure button near Advanced Trunk Configuration to open your portals configuration page.

On the Advanced Trunk Configuration Page click the Authentication Tab and click the Add button.

In the Authentication and User/Group Server click Add

In the Add Server Dialog enter the values for your ADAM Instance and the username and password for the user you configured for read access within you adam instance. If you do not want to login with the full dustinguishedName of the user you can fill out the userPrincipalName Attribute of the account. Then the users UPN can be used on the Add Server Dialog and for portal login.

Assuming you have configured your ADAM Instance correctly the Add Server Dialog will close and a new selectable authentication provider is in the list of possible sources on the Authentication and User/Group Server Dialog. Click the Select button and we are nearly at the end of the story.

Now we can create a new application in our portal. In my case i generated a new generic web application pointing to a Sharepoint Site configured to be an extended Site of an existing Intranet Site but located in the Extranet Zone and configured to use forms-based authentication against my Contos Demo ADAM Repository. In ADAM i created a group called Sharepoint. Thus we can security-trim the published Sharepoint Application only to be accessible for members of the Sharepoint Group. To do this, complete the add application wizard and enter the required information there. After completing the wizard edit the created application and select the Authorization Tab of the applications porperty window. Clear the All users are authorized checkbox.

Click the Add button and select the newly created ADAM Repository in the Select Users or Groups Window. Search for the group you created in your ADAM Instance and add the group by clicking the Add button

Click OK twice and activate your configuration. When the configuration activation has finished, you are able to logon to the portal with an account stored in ADAM and you will see the published application if you are a member of the Sharepoint group.
Keine Kommentare:
Kommentar veröffentlichen